
ความสามารถของ Apache Airflow
หลักการของ Apache Airflow
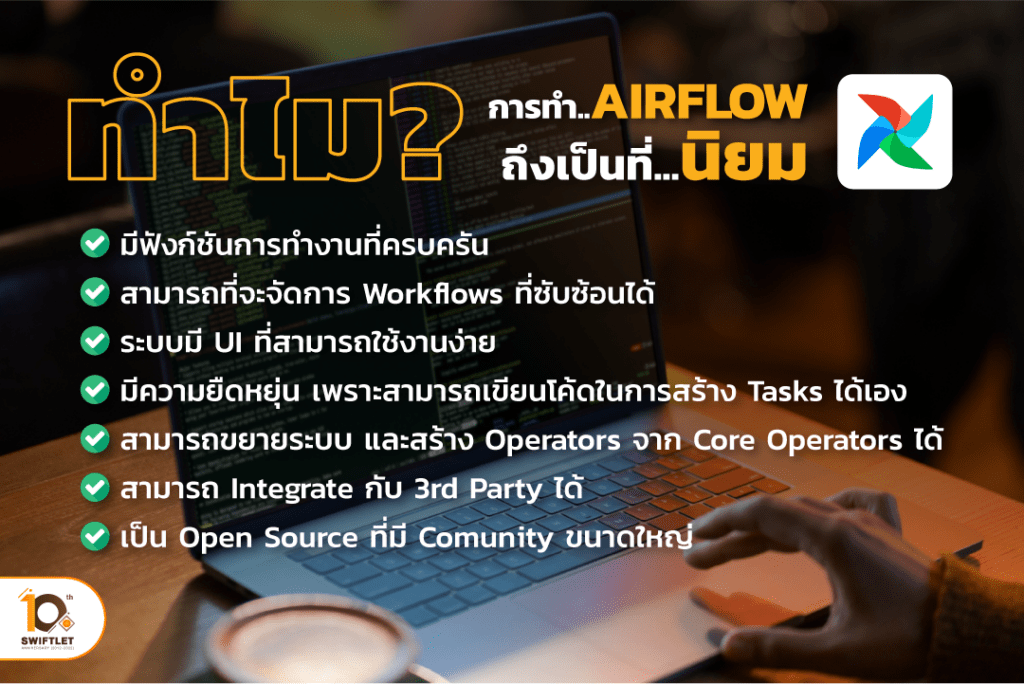
ทำไมการทำ Airflow ถึงเป็นที่นิยม
Example Scenario:
การติดตั้ง Apache Airflow ด้วย Docker
Step 1: Fetching docker-compose.yaml
สร้าง directory airflow ของเราขึ้นมา แล้ว download docker-compose.yaml ด้วยคำสั่งข้างล่างนี้
mkdir airflow-setup curl –LfO ‘https://airflow.apache.org/docs/apache-airflow/2.6.1/docker-compose.yaml‘ |
ใน docker-compose.yaml จะประกอบไปด้วย services ดังนี้
Step 2: Initializing Environment
ก่อนการรัน airflow ครั้งแรกต้องสร้าง directories ที่จำเป็น และ initialize database
Directories ที่จำเป็น
สร้าง directories ที่จำเป็นด้วยคำสั่ง
mkdir –p ./dags ./logs ./plugins ./config |
Initialize database
docker compose up airflow-init |
หลังจาก initialize สำเร็จจะได้ผลลัพธ์หน้าตาแบบนี้
airflow-init_1 | Upgrades done |
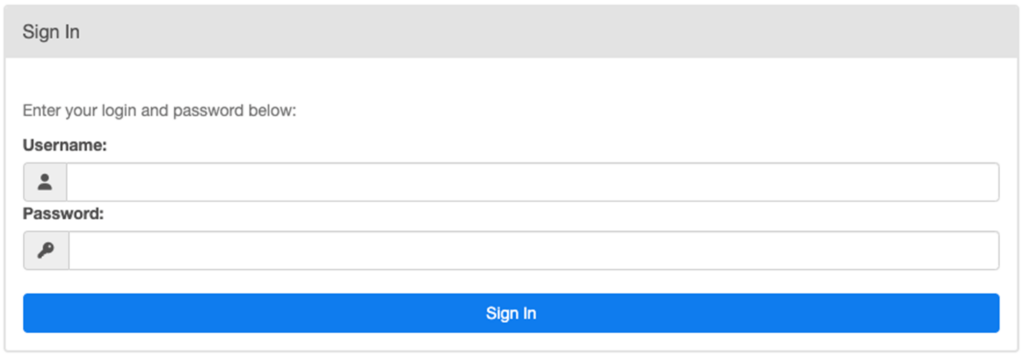
จะมี account ถูกสร้างขึ้นมา สามารถ login ด้วย username airflow และpassword airflow
Step 3: Running Airflow
ตอนนี้สามารถ start airflow ได้แล้วด้วยคำสั่ง
docker compose up |
แล้วเราสามารถ login เข้าใช้งาน web ui ของ airflow ได้ที่http://localhost:808
บริการ พัฒนาซอฟต์แวร์ แอปพลิเคชัน ตามความต้องการ!
เราเป็นผู้นำในด้านการให้บริการ พัฒนาซอฟต์แวร์ แอปพลิเคชัน และโซลูชันด้านไอที แบบครบวงจร (Full-stack) ตั้งแต่การให้คำปรึกษาไปจนถึงการ Maintenace ระบบ เรามีความตั้งใจที่จะเปลี่ยนให้ นวัตกรรม และไอเดีย ระดับโลกของคุณให้กลายเป็นซอฟต์แวร์ที่มีคุณภาพ โดยที่บริษัทรับพัฒนาซอฟต์แวร์ เขียนโปรแกรม และ แอปพลิเคชัน ตามความต้องการทางธุรกิจคุณได้ ทุกรูปแบบ ทุกประเภท ทุกความต้องการทางธุรกิจ หากคุณมีไอเดียดีๆ ที่ต้องการพัฒนา Software หรือ พัฒนา Application สามารถปรึกษาเราได้ที่นี่!